Before you start: Install Shadowrocket from the App Store and have your own subscription link or server details ready. This site does not provide, sell, or recommend servers or subscriptions. A one-time app purchase is not a service plan; buying the app does not generate server details.
Haven't installed the app yet? Start with the download and authenticity guide. For system requirements, refer to the App Store listing. Subscription links and server credentials are sensitive; don't include them in public screenshots or messages.
Step 01 / Add your details to the list
Add Server and Subscribe import
Server settings, subscription links, and QR codes are different kinds of information. Choose the option that matches what you have.
Add Server: Enter a single server
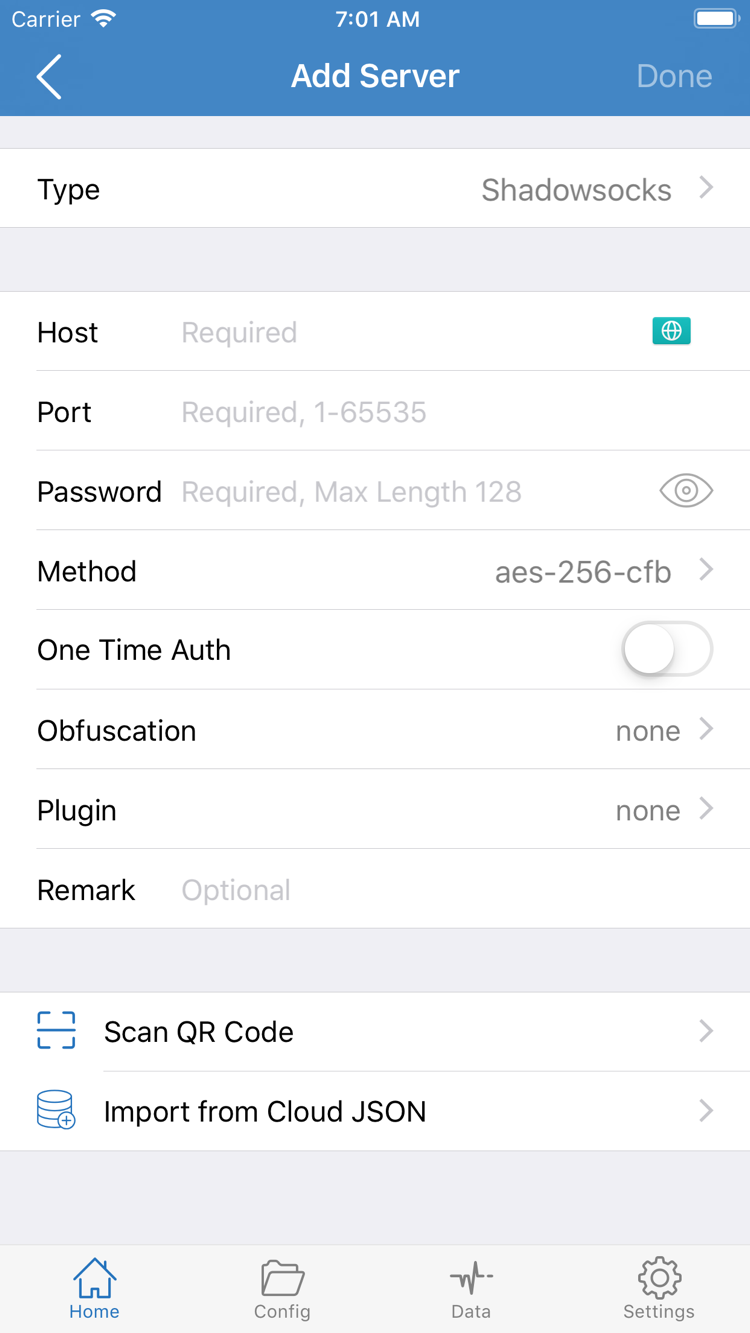
Open Shadowrocket and go to Home. Find the SERVER section and tap Add Server. On the Add Server screen, check Type first. It determines which fields you need to fill in; don't rely on the default just because the address looks familiar. If your details specify Shadowsocks, VMess, VLESS, or another protocol, choose the matching Type and enter the corresponding fields rather than guessing by trial and error.
Enter the server domain or address from your details in Host, and the corresponding port in Port. The available fields and how to fill them, such as Password and Method, depend on the selected protocol. The screenshot shows one screen layout with these fields; not every Type uses the same parameters. Don't paste an entire subscription link into Host or use a URL path as the server domain. Check for spaces or line breaks at either end, then save and return to Home.
If your details also include TLS, Server Name, a transport method, or a path, check the corresponding options as well. A correct address and port identify the connection destination but don't confirm that authentication and transport settings are complete. If you're unsure about a field, keep the value from your original details. For more on protocol fields, see Protocols in the technical reference.
Subscribe: Import an existing subscription link
If you have a complete subscription link, go to Config, find Subscribe, add and save the link, then update the subscription. Button locations may vary by screen, so look for the Subscribe label. A subscription retrieves and maintains a group of server entries; a configuration file can contain rules and other settings. They serve different purposes and aren't interchangeable just because both involve configuration.
When the update finishes, return to Home and check whether the corresponding entries appear in SERVER. Seeing a subscription name doesn't mean its contents were retrieved successfully; confirm that the group contains selectable servers. If the list is empty or an update error appears, check that the link is complete and still valid, and that your current network can retrieve it. You haven't reached the connection step yet, so there's no need to change Global Routing or DNS.
Scan QR Code and clipboard imports
If your details are provided as a QR code, use Scan QR Code and allow camera access when prompted. Check the detected Type and parameters before saving. For a share link, you can also use the app's clipboard import prompt or option; make sure the clipboard contains only the complete content you want to import, without any explanatory text. Import from Cloud JSON is for the corresponding format, not a universal option for every link.
Step complete when: Your details appear in the SERVER section on Home, and opening the entry lets you check its Type and address. Choose one clearly identified server for the next steps. For now, don't import multiple configurations from unknown sources, which can make it hard to tell which settings are in effect.
Step 02 / Choose how requests are handled
Global Routing mode selection
Config / Proxy / Direct
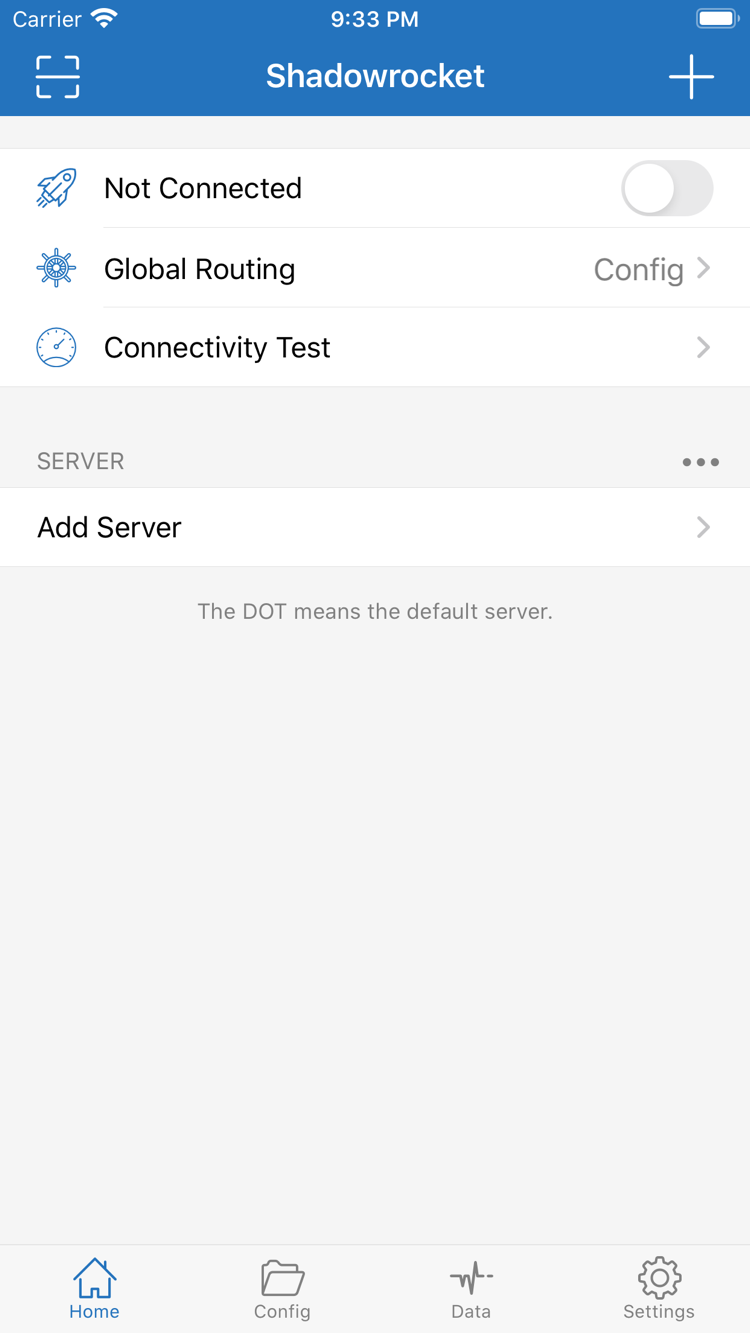
After importing your details, return to Home and tap Global Routing to check the current mode. The SERVER list determines which server is available; Global Routing determines how requests are handled. These are separate choices: selecting a server doesn't mean every request will go through it, and switching to Direct doesn't remove saved server details.
Config: Apply configuration rules
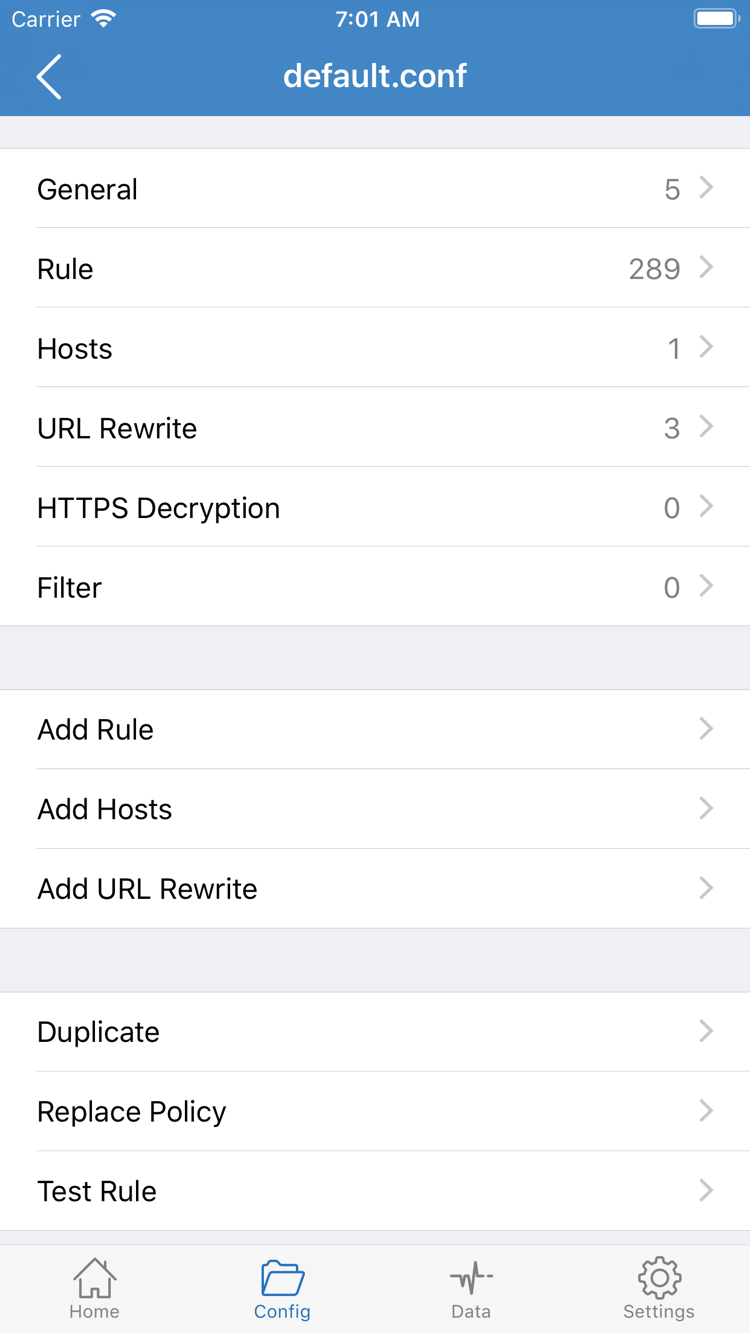
Choose Config when you need some requests to use a proxy and others to connect directly. Before doing so, go to Config and confirm that the intended configuration file is selected, not just saved in the list. General, Rule, Hosts, URL Rewrite, and HTTPS Decryption in the configuration editor cover different settings. For your first connection, focus on Rule; you don't need to enable the other features.
Rules in Rule are generally checked in order. A request uses the policy assigned to the first rule it matches. DOMAIN-SUFFIX matches domain suffixes, while FINAL handles requests that didn't match earlier rules. The snippet below illustrates “proxy this domain and connect directly for everything else.” example.com is a sample domain, not a server address or a rule target to use.
DOMAIN-SUFFIX,example.com,PROXY
FINAL,DIRECT
To add your own rules, find Rule and Add Rule in the configuration editor, then enter the target domain and policy. Place specific rules before FINAL. Also check the policy names in the current configuration and what they point to; copying a text snippet alone doesn't select a proxy server. If you already have a working configuration, leave it unchanged during the initial connection test and make adjustments one at a time afterward.
Proxy and Direct: Compare connection behavior
With Proxy selected, requests are handled through the current proxy route. This is useful for checking whether a problem comes from rules in Config. With Direct selected, requests bypass the selected proxy server, letting you check direct access over your current network. A website opening in Direct doesn't prove the proxy server works; a website opening in Proxy doesn't prove a particular Config rule is correct.
Keep one clearly defined mode for this guide and use it to connect and test in the next step. If you want to route traffic by rules, return to Config after testing rather than leaving Proxy selected as a long-term routing setup. If Global Routing also shows options such as Scene, you can leave them alone for now and compare these three basic modes first.
Step 03 / Connect in the app
Home switch and VPN configuration permission
Return to Home, select the server you want to use from the SERVER list, and confirm that the selection indicator is on the intended entry. Check Global Routing once more. A subscription may contain multiple entries with similar names, and their order may change after an update, so rely on the current selection rather than memory of what you used before.
Find the switch next to Not Connected at the top of the screen and turn it on. The first time you connect, the system may ask to add a VPN configuration. This prompt lets the app create the required network configuration. Check which app the prompt refers to and confirm as requested; authenticate on your device if needed. If you deny or cancel, the app can't complete this step. Start the connection again and respond to the permission request; there's no need to return to Add Server and re-enter your password.
After allowing the configuration, return to Shadowrocket and check whether the connection status at the top changes. If the switch turns off immediately or keeps returning to a disconnected state, stay on the screen and note what happens instead of toggling it repeatedly. Creating the system configuration, authenticating with the remote server, and accessing a website are separate steps. A switch that stays on means you can continue testing; it doesn't mean every website is accessible.
If another VPN configuration is active on your device, check in system settings which connection is actually in use. This helps avoid mistaking another connection's status for Shadowrocket's. On managed devices, policy may restrict the required permissions. Follow the limits set for your device, and don't delete system configurations if you're unsure what they're for.
Step complete when: You've handled the system permission, Home shows a change in connection status, and the selected server and Global Routing are as intended. Keep these selections unchanged for Connectivity Test and real-world access checks. For the first connection, leave On Demand off to avoid automatic connection conditions affecting the results.
Step 04 / Check connection status and access separately
Connectivity Test connection check
Tap Connectivity Test in Home and wait for the test to finish. It checks connection conditions using the selected method and can help identify obvious problems, but it doesn't measure the real response time of every website. Results vary with the test method, target, and network conditions at the time. Don't use values from different conditions as a fixed ranking.
If the test times out, don't delete the server entry right away. The cause could be an unreachable server, your current network, the test method, or the test target. Keep the same server and mode, then open the website you need to access and see whether it loads. Conversely, if the test returns a result but the website won't open, also check domain resolution, rule matching, and the website's status.
Test routing with real requests
With Config selected, check one destination expected to use the proxy and another expected to connect directly. If both open, that confirms access only. To verify the route, also check the configuration rules and any request logs available in the app; page load speed alone can't tell you which policy handled a request. If your configuration proxies only a few domains, be sure FINAL still uses the intended policy.
If access fails, temporarily switch from Config to Proxy and try again without changing servers. If Proxy works but Config doesn't, check rule order, policy targets, and related settings first. If both modes fail, check the server parameters and your current network. After comparing the results, restore the intended mode and test again so you don't leave a temporary diagnostic setting in place.
Change only one condition at a time while testing. If you switch servers, change networks, modify DNS, and update the configuration all at once, you won't know what fixed the issue. If caching affects your observations, reload the page or close and reopen it. For system-level information about DNS, see the DNS chapter in the technical reference.
Record these three results: Does Home stay connected? What does Connectivity Test report? Can you access the target website? These results correspond to different stages and are more useful for troubleshooting than simply saying “it won't connect.”
Step 05 / Check where the process first failed
Settings and common issues
Check only settings related to the issue you're seeing; don't use repeated reinstalls as a substitute for troubleshooting.
The list is empty or a subscription update returns no results
Go back to Step 1 and distinguish between a saved subscription entry and retrieved server details. Make sure the link includes all of its query string and wasn't pasted across multiple lines. Check that the subscription is still valid. If updates replace entries in the same group, don't rely on manual edits as a permanent fix; note any settings you need to keep and restore them from the original details. Changing the routing mode won't solve an import issue if no server entry was created.
The switch won't stay connected
First, check whether you've approved the system VPN configuration, then check which system connection is actually in use. If permission is already granted, review the selected server's Type, Host, Port, and authentication fields, paying particular attention to any protocol-specific options. Don't change only Password while overlooking Type. Subscription access credentials and individual server credentials aren't necessarily the same.
Connected, but the destination won't open
Complete the mode comparison in the previous section before changing settings. If only one destination fails, check its rule, name resolution, and availability. If several destinations fail, check the selected server and current network. Proxy, TCP, and UDP in Settings each have specific functions; they're not general-purpose repair switches. Leave uncertain settings unchanged until the basic connection is verified, rather than making a wider set of changes.
Test results look wrong, or you need to check Diagnostics
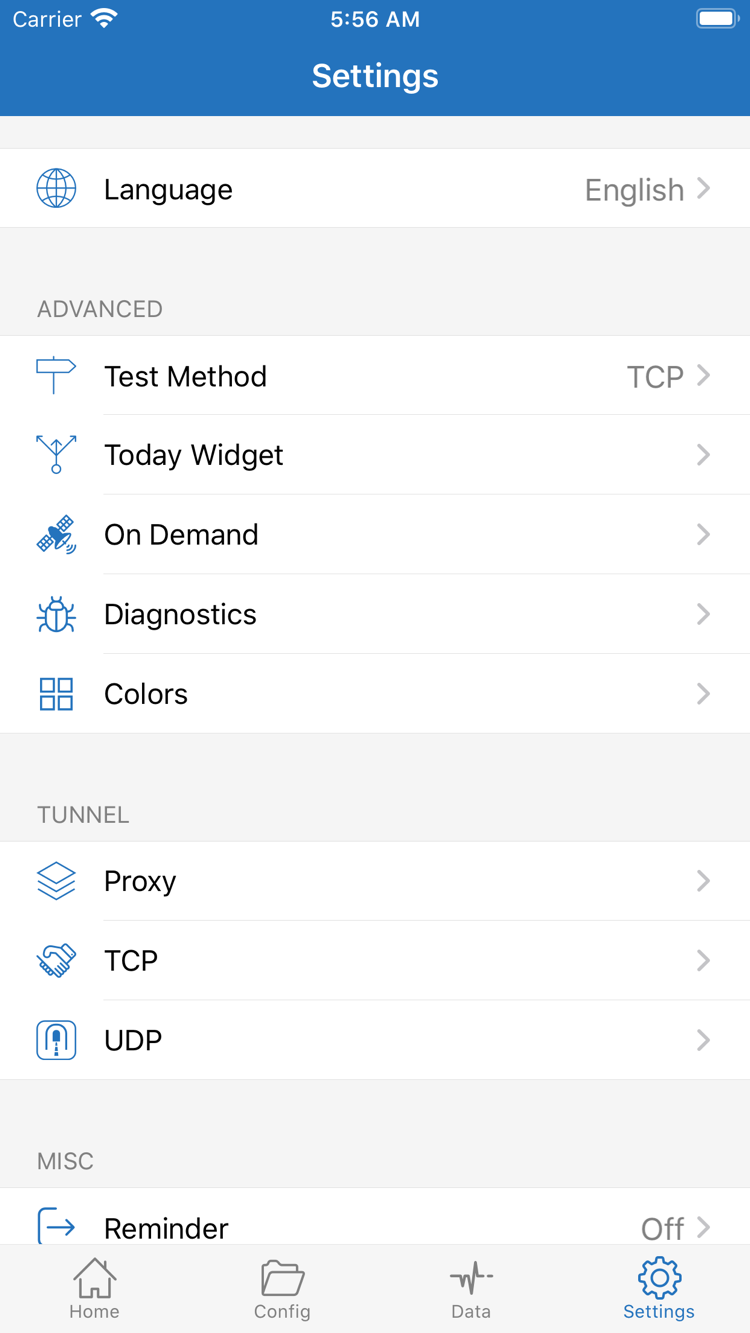
Go to Settings, find Test Method, and check the selected method. Then return to Home and run Connectivity Test again. Changing the test method can change what the results mean, so note the method along with the result. For further troubleshooting, review the information in Diagnostics and identify where the failure occurs. Before sharing the issue, hide server addresses, subscription links, and credentials.
On Demand in Settings triggers connections based on conditions. It doesn't fix incorrect server settings or determine which rule matches a domain. Consider configuring it for your network conditions only after manual connections are stable. If a connection starts without you initiating it, check the On Demand conditions rather than repeatedly turning the Home switch off.
What to check before you finish
Return to Home and confirm the target server, Global Routing mode, and connection status, then test real access once more. Keep the combination you've confirmed works as your baseline. When you later change rules or settings, start from that state and change one thing at a time. After a subscription update, check the selected entry again in case its name or position has changed.
The basic workflow is now complete: your details appear in the SERVER list, the routing mode matches your needs, the system allows the connection, and you've tested real access. For more on protocol fields, rules, and DNS, see the technical reference. To review the steps, return to the import section of this guide. There's no need to change every advanced setting at once.